/
Configuring the IzoT Router DHCP Server
Configuring the IzoT Router DHCP Server
- Nina Cardillo
- Sacha Parisot (Unlicensed)
Owned by Nina Cardillo
06-Jun-2022
You can configure the IzoT Router to be a DHCP server for LonTalk/IP devices on the LON channels attached to the IzoT Router, or to relay DHCP messages to an external DHCP server located on the LAN. You can use the IzoT Router DHCP server for LonTalk/IP device IP address assignment when you are not using an IzoT Net Server or LNS Server to manage LonTalk address assignment, for example when using the interoperable self-installation (ISI) protocol to create a self-installed network without an IzoT Net Server or LNS Server.
To enable and configure the IzoT Router DHCP server, follow these steps:
- Open the IzoT Router Configuration Web page, following the procedure in Configuring the IzoT Router.
- Click DHCP at the top of the page. The following page appears:
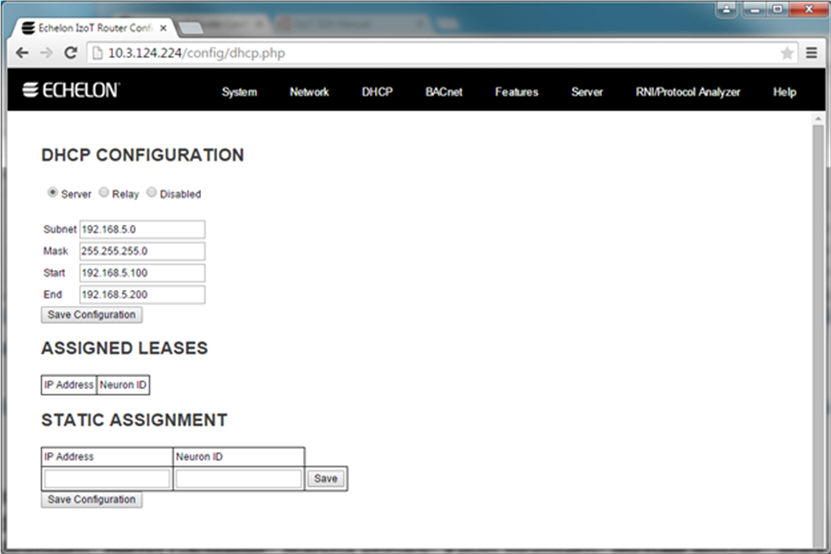
- Click the Server option.
- Enter the subnet to use for the LonTalk/IP channel in Subnet.
- Enter the subnet mask to use for the LonTalk/IP channel in Subnet Mask.
- Enter the starting and ending IP address for the IP address range to be managed by the DHCP server in Start and End.
- Click Save Configuration.
To enable the DHCP relay, follow these steps:
- Open the IzoT Router Configuration Web page.
- Click DHCP at the top of the page.
- Click the Relay option.
- Click Save Configuration.
To disable the DHCP server and the DHCP relay, follow these steps:
- Open the IzoT Router Network Configuration Web page.
- Click DHCP at the top of the page.
- Click the Disabled option.
- Click Save Configuration.
, multiple selections available,
Related content
Configuring the IzoT Router
Configuring the IzoT Router
More like this
Setting Up the IzoT Router
Setting Up the IzoT Router
More like this
Configuring the IzoT Server
Configuring the IzoT Server
More like this
Installing the IzoT Router in a Network
Installing the IzoT Router in a Network
More like this
Managing IzoT Router System Configuration
Managing IzoT Router System Configuration
More like this
Troubleshooting the IzoT Router
Troubleshooting the IzoT Router
More like this