Managing IzoT Router System Configuration
- Nina Cardillo
- Sacha Parisot (Unlicensed)
You can view IzoT Router status, change the IzoT Router username and password, reboot the IzoT Router, and you can reset the IzoT Router to its factory default configuration.
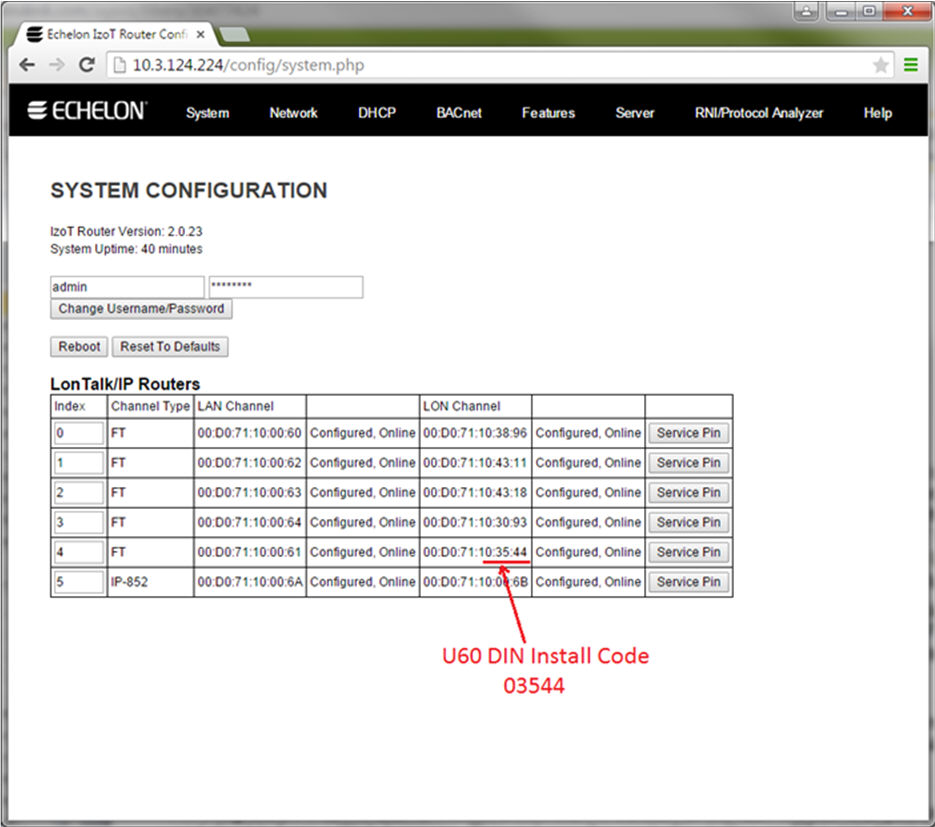
The LonTalk Routers table contains one entry for each available router in the IzoT Router. A router is available for the built-in LON FT interface, for the built-in IP-852 interface (if enabled), and for each U60 DIN Network Interface you plug into one of the USB interfaces of the IzoT Router. You can use the Service Pin buttons in the table to send Service messages for specific routers within the IzoT Router. When you press the Service Pin button, the IzoT Router sends a Service message on the LonTalk/IP-LAN (IP-70) channel, and also sends a Service message on the selected LON or IP-852 channel.
You can change the order the routers that are listed in the table. To change the order, enter index numbers in the Index column in the order to be used for listing the routers. This value is only used to determine the order that the routers are listed in the table—it has no other effect on IzoT Router functionality.
To manage the IzoT Router system configuration, follow these steps:
- Open the IzoT Router Network Configuration page, following the procedure in Configuring the IzoT Router.
- Click System at the top of the page. The following page appears. The IzoT Router software version number and the uptime since the last IzoT Router restart are displayed.
- To change the username or password, enter the new username and password and then click Change Username/Password.
- To reboot the IzoT Router, click Reboot.
- To reset the IzoT Router to the factory default configuration, click Reset to Defaults.