Creating a Network with the IzoT Commissioning Tool
You can create a CPM 4200 device that installs itself using the Interoperable Self-Installation (ISI) protocol, or you can create a device that is installed with a network management tool. You can also create a device that supports both installation methods, that is, you can create a device that installs itself in self-installed networks, or is installed by a network management tool in a managed network.
For installation into a managed network, you can use the IzoT Commissioning Tool (CT) or another tool that can install and monitor LonTalk/IP or LON devices. See the IzoT Commissioning Tool User's Guide for more information about IzoT CT. However, if your CPM 4200 device supports the ISI protocol, a network management tool is not required.
To install a CPM 4200 device in a network with IzoT CT, follow these steps:
- If you have not installed the OpenLNS Commissioning Tool and the IzoT Net Server, install them as described in Installing the IzoT CPM 4200 Wi-Fi SDK. The IzoT Commissioning Tool is what you have installed after you install both OpenLNS CT and the IzoT Net Server. In any dialogs, it is still called the OpenLNS Commissioning Tool or OpenLNS CT.
- Click the Windows Start menu, type OpenLNS in the search box, and then click the OpenLNS Commissioning Tool link under Programs.
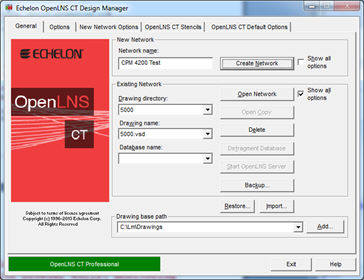
- Enter a name for the network in the Network Name box. The figure above has a network name of CPM 4200 Test, and then click Create Network. The following dialog appears:
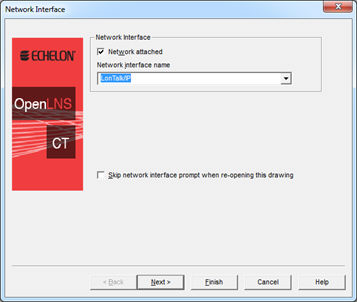
- Select Network attached, select the LonTalk/IP interface you created as described in Installing the IzoT CPM 4200 Wi-Fi SDK as the Network interface name, and then click Next. The following dialog appears:
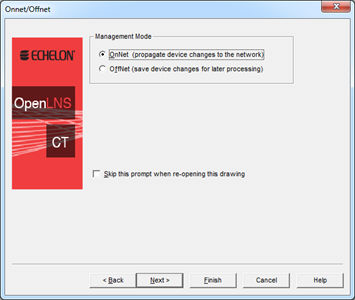
- Select OnNet and then click Finish. An initial network drawing with your network interface and a single channel appears.
- Right-click the channel and then click Properties. The following dialog appears:

- Change the Channel Name to a name that identifies it as a LAN channel (such as LAN or Wi-Fi), change the Transceiver Type to IP-10L, and then click OK.
- Drag a Device shape from the OpenLNS CT Basic Shapes stencil or the NodeBuilder Basic Shapes stencil to the drawing. The following dialog appears:
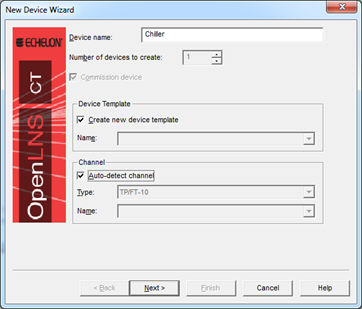
- Change Device name(s) to a name that identifies your device (such as Chiller in the above example) and ensure that Commission device, Create new device template, and Auto-detect channel are all selected, and then click Next. The following dialog appears:
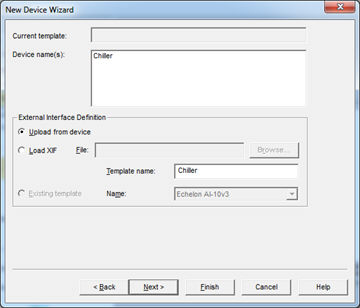
- Ensure Upload from device is selected, and then click Next and the following dialog appears:
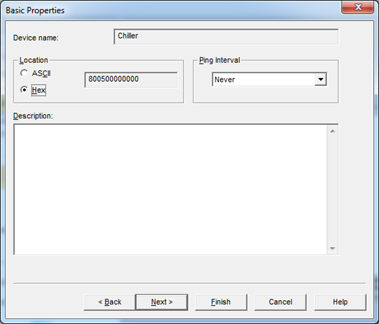
- Click Next and the following dialog appears:
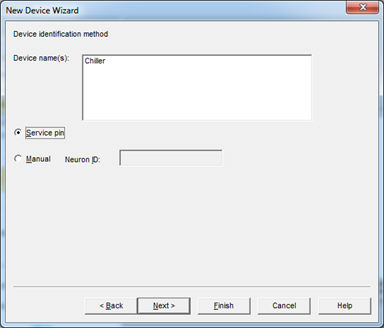
- Click Next and the following dialog appears:
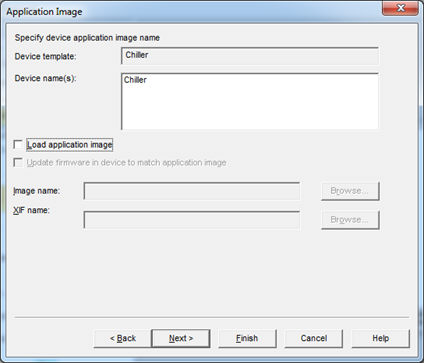
- Click Next and the following dialog appears:
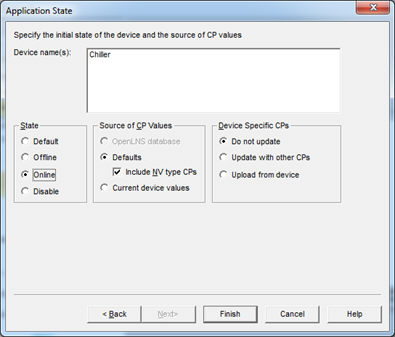
- Ensure that Online is selected as the State, and then click Finish. The following dialog appears:
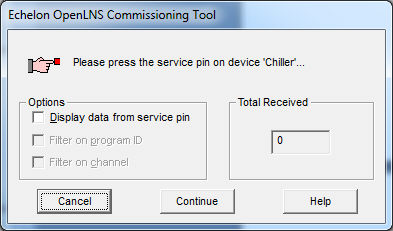
- Press the Service button on your CPM 4200 device. On a CPM 4200 EVB, the Service button is labelled SW1 and is the lower right hand button of the bank of four buttons. The device sends a Service message that IzoT CT receives, and then IzoT CT commissions the device into the network.
- Drag a Functional Block shape from the OpenLNS CT Basic Shapes or the NodeBuilder Basic Shapes stencil stencil to the drawing and the following dialog appears:
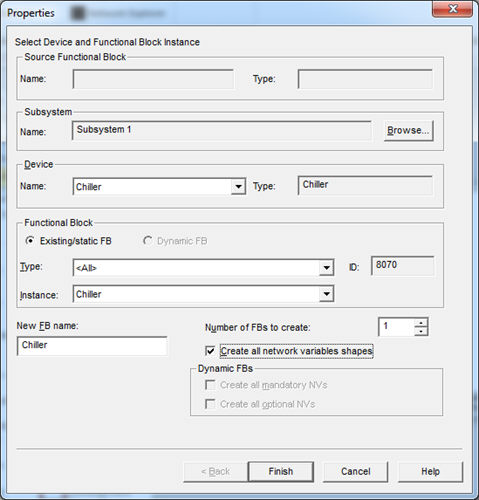
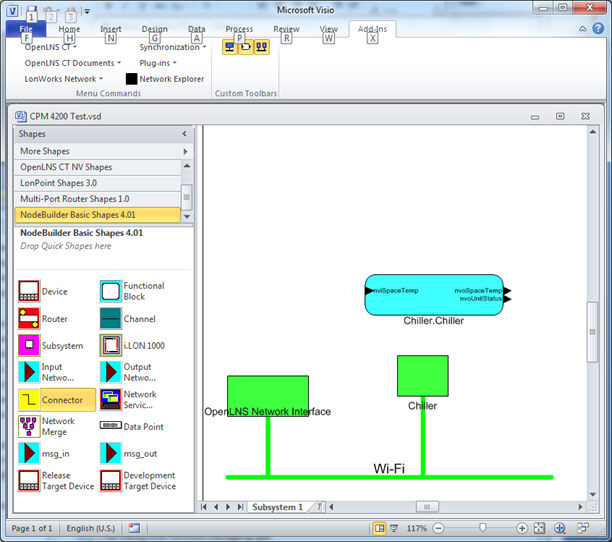
- Select a functional block from your device as the Functional Block Instance, ensure that Create all network variable shapes is selected, and then click Finish. IzoT CT adds the functional block to the drawing, similar to the following figure:
- Right-click the new functional block and then click Browse. The IzoT CT Browser opens.
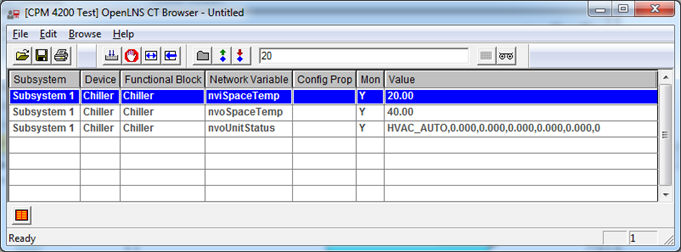
- Click the Monitor All On button in the toolbar. It is the button immediately to the left of the hand icon, which is the Monitor All Off button. You can now use the IzoT CT Browser to monitor the network inputs and outputs for your device, and to update any of the network inputs. The network inputs are highlighted in blue (for datapoint inputs) or green (for property inputs). The IzoT CT Browser is a separate application from your drawing, so you can return to your drawing and make more changes to the network while the IzoT CT Browser remains open.
- You can add additional functional blocks, devices, routers, and channels to the IzoT CT drawing. You can also add connections to enable devices in your network to communicate by exchanging datapoints using the connections that you define.